
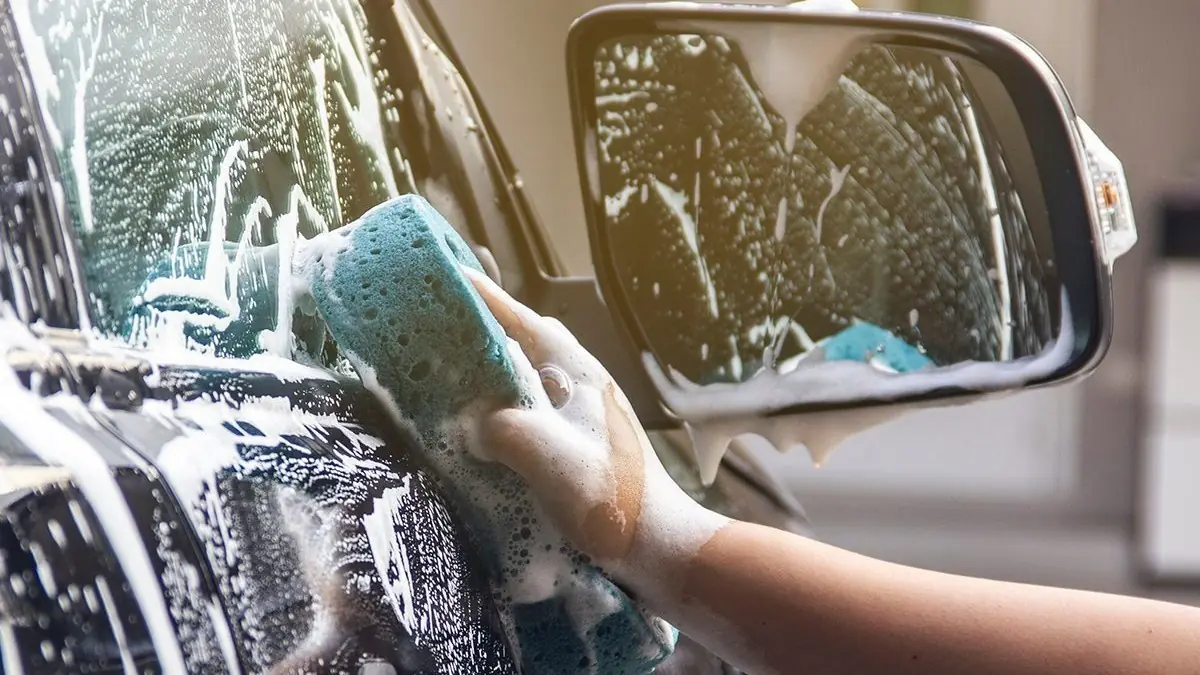
A freshly washed car looks simple from the street. In fact, the shine hides a sequence of small decisions, and each one either protects the paint or puts fine marks into it. Learning how to wash a car properly therefore matters far more than simply getting the car wet and soapy. This guide walks through the whole job in order, from preparation to the final check, so a first attempt ends with a clean car and no regrets.
Beginners often worry about doing something wrong. However, most wash damage comes from a handful of avoidable habits, such as dragging dry dirt across paint or letting soapy water dry in the sun. As a result, a careful method beats expensive equipment every time. With a basic kit, a shaded spot, and enough patience, anyone can learn how to wash a car at home for beginners without special training.
Before touching the car, check the owner’s manual for your model. Manufacturers sometimes give washing advice for specific trims, finishes, or fitted accessories, and that guidance should come first. For example, some manuals warn against high-pressure water near sensors, badges, or soft roof materials. In addition, matt finishes and vinyl wraps often need gentler care than ordinary glossy paint. Following your car maker’s manual framing keeps this general guide on safe ground for your particular vehicle.
Why Does Washing a Car Properly Matter More Than Washing It Quickly?
Paint looks hard, yet its clear top layer marks more easily than many people expect. Road grit, dust, and dried mud act like fine sandpaper when they are rubbed across a panel. Similarly, bird droppings and tree sap can stain paint if they sit for days in warm weather. A rushed wash pushes that grit around instead of lifting it away, so the car can end up cleaner yet more scratched than before.
Regular washing also protects parts that paint alone cannot save. Salt, mud, and grime collect around wheel arches, door edges, and the lower sills. Over time, trapped moisture in those spots encourages corrosion, especially on older cars. Therefore, washing is not only about appearance. It is routine care that keeps panels, trims, and glass in good condition between services.
Speed still has a place in the routine. For instance, rinsing off fresh mud soon after a wet drive prevents it from hardening into a crust. However, speed should never replace the rinsing and lubrication steps that keep grit away from paint. In short, wash promptly when the car is dirty, but wash gently every single time.
What Should You Gather Before You Start Washing?
Preparation prevents most beginner mistakes. Gather everything before the first rinse, because walking away mid-wash lets water dry into spots. A basic kit needs two buckets, a wash mitt, a dedicated wheel brush or old mitt, several clean microfibre drying towels, and a bottle of car wash soap. In addition, keep a separate glass cloth and a gentle glass cleaner ready for the windows.
Choose a location with care. Shade is ideal, since it slows drying and gives you time to work panel by panel. A flat driveway or quiet yard works well, provided the ground drains safely and the hose reaches the whole car. Meanwhile, move loose items out of the boot and cabin only if you plan to clean door shuts later. Otherwise, keep the focus on the outside of the car for this first wash.
Check your water supply and your hands before starting. Remove rings, watches, and belt buckles that could brush against paint while you lean across panels. Similarly, shake out the wash mitt and check it for trapped grit from the last wash. A clean mitt, clean towels, and clean buckets form the foundation of every safe wash that follows.
What Order Should You Wash a Car in?
Beginners often ask what order should you wash a car in, and the answer follows one simple rule. Work from the cleanest areas towards the dirtiest ones, and from the top of the car downwards. Gravity carries dirty water down, so starting low means washing panels twice. Starting high means each rinse helps the panels below it, not the other way round.
A reliable sequence looks like this. First, rinse the whole car to loosen surface dirt. Next, wash the roof, windows, bonnet, and upper doors. Then move to the lower doors, bumpers, and sills, which carry the heaviest road film. After that, clean the wheels and wheel arches. Finally, rinse everything once more and dry the car promptly.
Some washers clean the wheels before the bodywork, and that choice has a real logic behind it. Wheels throw dirty water onto nearby panels, so finishing them first can mean re-rinsing the lower bodywork anyway. On the other hand, washing wheels last keeps the dirtiest job separate from the paintwork. Either way, the key habit stays the same. Use separate tools for wheels and paint, and never carry wheel grime onto a body panel.
Do You Wash Wheels First or Last?
So do you wash wheels first or last? For most beginners, last works best, because it keeps the dirtiest water and the stiffest brush away from the paint until the bodywork is already clean. Wash the wheels after the panels, rinse the lower bodywork again, and then move straight to drying. As a result, brake dust and road tar stay where they belong.
Wheel-first washing suits a different situation. If the wheels are caked in mud, cleaning them first stops thick grime from splashing onto freshly washed doors. In that case, rinse the wheels fully, wash them with their own brush, and then rinse the lower panels before starting the bodywork. Either order can work, provided the wheel tools never touch the paintwork afterwards.
While the wheels are clean, take a moment to look at them properly. Check tyre sidewalls for cuts, bulges, or embedded objects, and glance at the tread depth across each tyre. If anything looks uneven or damaged, note it for a professional inspection rather than trying to fix it at the kerb. For context on what uneven wear can mean, our guide on what happens if wheel alignment is skipped after a tyre change explains why alignment checks matter after tyre work.
What Is the Two Bucket Car Wash Method?
Here is the two bucket car wash method explained in plain steps. One bucket holds clean, soapy wash water. The second bucket holds plain rinse water, and it often has a grit guard at the bottom. After washing one panel, rinse the mitt in the plain water bucket before dipping it back into the soapy bucket. Consequently, grit stays in the rinse bucket instead of returning to the paint.
Rub the mitt gently against the grit guard if your rinse bucket has one. The guard traps dirt below the waterline, so the mitt picks up less of it on the next dip. Without a guard, the same idea still works. Swirl the mitt in the rinse water, lift it out, and squeeze it before reloading it with soapy water. In addition, change the rinse water if it turns visibly dark or gritty halfway through.
Two buckets sound fussy until the first wash is done. However, the habit takes only seconds per panel, and it removes the main cause of wash marks. Dirty mitts cause swirls, while clean mitts glide. Therefore, the two-bucket routine deserves its reputation as the single best beginner upgrade. It costs almost nothing, and it protects every panel you touch.
How Do You Prepare the Car With a Pre-Rinse?
A pre-rinse is the step beginners skip most often, and it is also the cheapest insurance in the whole wash. Spray the car from top to bottom with plain water, using a hose or a gentle pressure washer setting. The goal is to float loose dust, mud, and grit off the surface before any mitt touches it. As a result, far less dirt remains to be dragged across the paint.
Spend extra time on the dirtiest zones. Wheel arches, lower sills, bumpers, and the front grille collect insects, mud, and road film. Let the water run over those areas for a while, and use a soft jet to reach inside the arches. Meanwhile, avoid blasting water directly at panel gaps, badges, or sensor areas at close range. Gentle, steady rinsing removes more dirt safely than a fierce jet ever will.
If dried mud or insect remains still cling after rinsing, do not scrub them dry. Instead, soak the area with soapy water and give it a minute to soften. Patience here prevents scratches that no polish can easily hide. Finally, check that the whole car is wet before the contact wash begins. A dry patch is a warning sign, since washing it means rubbing dirt across unprotected paint.
How to Wash a Car Without Scratching the Paint?
The honest answer to how to wash a car without scratching the paint is that technique matters more than products. Use plenty of soapy water, keep the mitt clean, and let the soap do the lifting. Glide the mitt across each panel in straight, overlapping lines, with almost no downward pressure. Light, wet strokes carry grit away, while hard scrubbing grinds it into the clear coat.
Work one panel at a time, and rinse the mitt in the rinse bucket between panels. For example, wash the roof, rinse the mitt, and then move to the bonnet. After that, wash one side of the car from top to bottom before starting the other side. This rhythm keeps the mitt clean, the soap wet, and the dirt moving off the car instead of around it.
Watch for warning signs as you wash. A gritty feeling under the mitt means dirt is trapped in the fibres, so rinse immediately. Similarly, a dry or dragging mitt means the panel needs more soapy water. Never use a household scouring pad, a rough cloth, or a dirty sponge on paint. Those tools may feel effective, yet they leave fine marks that only show up later in bright sunlight.
Microfiber Wash Mitt vs Sponge for Car Washing: Which One Is Kinder to Paint?
The debate over microfiber wash mitt vs sponge for car washing comes down to how each tool holds dirt. A microfibre mitt has long, soft fibres that trap grit deep inside, away from the paint surface. A flat sponge, by contrast, holds grit against its face, right where it meets the panel. Consequently, a mitt gives trapped dirt somewhere safe to go, while a sponge gives it nowhere to hide.
Mitts also hold more soapy water than most sponges. That extra lubrication helps the mitt glide, and gliding is exactly what safe washing needs. In addition, a mitt fits over the hand, which makes pressure easier to control across curved panels. Sponges still have uses, such as cleaning wheels or door shuts, where paint safety matters less. However, for bodywork, a clean microfibre mitt is the safer beginner choice.
Whichever tool you choose, cleanliness decides the result. Rinse it often, wash it after use, and replace it when the fibres flatten or feel rough. A worn mitt can mark paint just as surely as a dirty sponge. Therefore, treat wash tools as consumables, not lifetime purchases, and retire them at the first sign of wear.
Can You Use Dish Soap to Wash a Car?
Many beginners ask can you use dish soap to wash a car, and the short answer is that it is best avoided. Dish soap is designed to strip grease from plates, and it can strip protective wax and sealant layers from paint as well. One wash is unlikely to ruin a car, yet repeated use leaves paint less protected and more exposed to dirt and water marks.
The comparison of car wash soap vs household detergent makes the difference clear. Car wash soap is formulated to lift road dirt while leaving protective layers mostly intact. Household detergents, by contrast, are made for dishes, floors, or laundry, and their cleaning strength is not tuned for automotive paint. In addition, some household products leave residues that dull the finish or streak across glass.
Dedicated car wash soap costs little per wash, since only a small amount is needed in a bucket of water. Follow the dilution directions on the bottle, because extra soap does not mean extra cleaning. Too much soap leaves residue that is harder to rinse, while too little reduces lubrication. When in doubt, use the recommended amount and let technique, not concentration, do the work.
As you master the art of washing your car, it’s essential to recognize that maintaining that freshly cleaned look extends beyond just the wash itself. Once you’ve perfected your washing technique, the next critical step is to protect that pristine finish through regular waxing. Wax acts as a barrier against environmental contaminants and UV rays, preserving the paint’s integrity and enhancing its shine. Understanding the nuances of wax application and its benefits is key to sustaining your car’s aesthetic appeal. For those looking to delve deeper into the intricacies of this essential process, exploring the car waxing basics will equip you with the knowledge needed to ensure your car remains a head-turner for years to come.
What Is a Pressure Washer Safe Distance for Car Paint?
Pressure washers save time, but they need respect. The question of pressure washer safe distance for car paint has no single universal number, because machines and nozzles vary widely. As a general beginner rule, keep the nozzle well back from the surface, use a wide fan spray rather than a narrow jet, and never hold the spray in one spot. Your car maker’s manual may give specific guidance for your model, so check it before the first use.
Distance matters most on vulnerable areas. Badges, trims, mirror housings, and older paint need extra care, since a close jet can lift edges or force water past seals. Similarly, keep the spray moving across wheel arches and sills rather than blasting mud at point-blank range. If the machine has adjustable pressure, start at the lowest setting that still rinses effectively. Gentle and steady always beats close and fierce.
A pressure washer is a rinsing tool for most beginners, not a scrubbing replacement. Use it for the pre-rinse and the final rinse, then wash by hand with a mitt for the contact stage. This combination removes loose dirt safely and leaves the careful work to your hands. If you are unsure about a setting, test it first on a lower sill or an inconspicuous area.
How to Wash a Car in Direct Sunlight Safely?
Shade is always preferable, yet washing in sun is sometimes unavoidable. Learning how to wash a car in direct sunlight safely starts with speed and panel-by-panel work. Wash and rinse one panel at a time, so soapy water never sits long enough to dry. Meanwhile, keep the rest of the car wet with occasional light sprays from the hose.
Hot panels dry faster than cool ones, and dried soap leaves marks that can be stubborn to remove. Therefore, work on the shaded side of the car first if any shade exists at all. In addition, use slightly more rinse water than usual, and dry each section as soon as it is rinsed. A second person holding the hose can help, although one careful washer can manage by staying disciplined about small sections.
If spots or soap residue do appear, do not panic. Re-wet the panel, wash it again lightly, and rinse thoroughly before drying. Most sun-related marks come from dried soap or hard water, not from permanent damage. However, repeated sun washing without care can dull protective layers over time. So whenever possible, choose a cloudy day, early morning, or late afternoon for the wash.
How to Dry a Car Without Water Spots?
Drying is where many good washes go wrong. The secret of how to dry a car without water spots is simply to remove water before it evaporates. Minerals in tap water stay behind when droplets dry, and those minerals form the pale spots seen on dark paint. Consequently, drying promptly matters just as much as washing gently.
Use large, clean microfibre drying towels, and lay them flat across each panel rather than rubbing in circles. Pat or drag lightly, letting the towel absorb water in a single pass. For example, start with the roof and glass, then move down the sides. Wring the towel out often, and switch to a dry one when it stops absorbing well. A damp towel that is dragged across paint can leave streaks of its own.
Pay attention to the hiding places where water collects. Mirrors, door handles, badges, fuel flaps, and boot edges all drip after the main panels look dry. Open each door briefly and wipe the shuts, then close it and check for fresh drips. Similarly, a short, slow drive around the block can shake water out of mirrors and trims, although you should then wipe the resulting drips before they dry.
How to Clean Car Windows Without Streaks?
Clean glass transforms the whole car, yet windows streak easily when washed with the same soapy mitt as the bodywork. The method for how to clean car windows without streaks starts with separation. Wash the glass during the main wash, but finish it afterwards with a dedicated glass cloth and a proper glass cleaner. As a result, soap film and wax residue never get smeared across the view.
Work in straight lines, and wipe one side of the glass vertically and the other side horizontally. This old detailing trick makes streaks easy to trace, since a vertical streak must sit on the outside and a horizontal one on the inside. In addition, clean the inside of the windows as well, because interior film from plastics and dust causes just as much glare as outside dirt.
Check your work from different angles before finishing. A window that looks clear head-on can show streaks when sunlight hits it sideways. Similarly, check the windscreen from the driver’s seat, since that is the view that matters most. If streaks remain, wipe again with a clean, dry section of the cloth rather than adding more cleaner. Excess product is a common cause of streaks in the first place.
How to Remove Bird Droppings From Car Paint Safely?
Bird droppings look harmless, yet they deserve quick attention. The method for how to remove bird droppings from car paint safely starts with softening, never scraping. Lay a damp microfibre cloth over the spot for a few minutes, or spray it with water and car wash solution. Once the deposit softens, lift it gently with the cloth instead of rubbing it across the panel.
Never use a dry tissue, a rough paper towel, or a fingernail on dried droppings. Those materials can drag gritty particles across the paint and leave fine scratches. In addition, avoid household cleaners that are not meant for automotive paint. Plain water, car wash soap, and patience remove most deposits safely. If a faint mark remains after cleaning, note it and check it again after the next wash before considering any stronger treatment.
Speed matters more than strength here. Fresh droppings lift easily, while baked-on deposits need longer soaking. Therefore, keep a small spray bottle and a clean cloth in the car during seasons when birds are active. A two-minute roadside soak can save a panel from a stain that would otherwise need professional attention later.
How Often Should You Wash Your Car?
Drivers often ask how often should you wash your car, and the honest answer depends on use, climate, and exposure. A car driven daily through rain, mud, or coastal air needs washing more often than a garaged car used for short weekend trips. As a rough guide, many owners find that washing every two weeks keeps dirt from building into stubborn layers. However, this is a starting point, not a rule carved in stone.
Certain conditions call for quicker action. Road salt, sea spray, mud, and bird droppings should not sit for weeks, since they cling to paint and trims. Similarly, cars parked under trees collect sap, pollen, and droppings that harden in warm weather. In those cases, a quick rinse or a spot clean between full washes protects the paint without turning every week into a full detailing session.
Climate changes the picture as well. Dusty, dry conditions coat a car in fine grit that should be rinsed before it is rubbed. Wet, humid conditions leave water sitting in seams and arches, so drying matters even more. In addition, garaged cars still collect dust, although they usually need less frequent washing than cars parked outside. Match the schedule to what the car actually faces, and let visible dirt, not the calendar alone, guide the decision.
Is It Bad to Wash Your Car Every Day?
So is it bad to wash your car every day? Daily washing is not automatically harmful, provided every wash follows the gentle method in this guide. A careful rinse and mitt wash with clean tools should not damage healthy paint. However, daily washing multiplies the chances of a mistake, such as a gritty mitt, a rushed dry, or soap left to bake in the sun.
For most owners, daily full washes are unnecessary. A daily rinse makes more sense when the car faces heavy dust, mud, or salt, since rinsing removes loose dirt without a full contact wash. In addition, daily washing wears through protective wax layers faster, which means more frequent reapplication. Balance matters here. Wash when the car needs it, rinse when it only needs a refresh, and save full washes for genuine dirt.
If daily washing fits your situation, protect the routine with strict habits. Keep mitts and towels clean, change rinse water often, and dry thoroughly every time. A disciplined daily washer will do less harm than a careless monthly washer. Nevertheless, most beginners do better with a fortnightly full wash and quick rinses in between.
What Should You Check After the Wash?
An after-wash check takes five minutes and catches problems while they are easy to fix. Walk slowly around the car in good light, and look for missed patches, soap residue, and water spots. Lower bumpers, sills, and the rear of the car hide dirt most often, since they sit out of easy sight. Similarly, check around badges and number plate surrounds, where soapy water tends to collect.
Look at the tyres and wheels once more while you are there. Note any cuts, bulges, or uneven wear for later inspection, and think about whether the tyres still suit your driving. If a change is on the horizon, our guide to choosing tyres for daily versus off-road use shows how driving patterns shape tyre choice. In addition, wheel fixings deserve respect. Our explainer on how to measure a car wheel bolt pattern correctly is useful background before any wheel work is attempted.
Finally, check the glass from the driver’s seat and test the wipers briefly. Streaks found now can be wiped away in seconds, while streaks found on the road become a distraction. If anything beyond washing needs attention, such as a damaged trim or a mechanical concern, a professional inspection is the sensible next step. General car care services, such as those described by Martinez Complete Auto Service and Tommy’s Auto Service, handle jobs that sit beyond a driveway wash.
What Are the Most Common Beginner Mistakes?
Most beginner mistakes share one root cause, which is rushing. Washing a dry, dusty car without a pre-rinse drags grit straight across the paint. Similarly, using one bucket for everything returns that grit to the mitt again and again. Both habits feel faster, yet both create marks that take far longer to correct than the wash itself saved.
Other mistakes involve the wrong tools or the wrong products. Household detergents strip protection, rough cloths scratch paint, and old towels shed lint across glass. In addition, washing in strong sun without a panel-by-panel plan bakes soap onto hot panels. Each mistake is easy to avoid once it is named, and naming them is exactly why a checklist beats memory.
The final common mistake is stopping at the wash itself. Skipping the drying step invites water spots, while skipping the after-wash check leaves missed dirt to harden. For example, a drip from a mirror can dry into a streak down a clean door within minutes. Therefore, treat drying and checking as part of the wash, not as optional extras. A complete job includes all three stages.
What Does a Simple Beginner Checklist Look Like?
A checklist turns this long guide into a habit. Before washing, gather two buckets, a mitt, towels, and car wash soap, and park in shade where possible. During washing, rinse first, wash top to bottom with the two-bucket method, and keep wheel tools separate. After washing, dry promptly, wipe the glass, and walk around the car for a final check. Following that order, step by step, covers everything that matters.
Keep the kit clean between washes as well. Wash mitts and towels after use, and store them somewhere dust-free. A dirty mitt undoes every careful step in the next wash, so kit care is part of car care. Similarly, replace worn tools early rather than stretching them through another season. Fresh fibres protect paint far better than tired ones.
When a job goes beyond washing, get professional help rather than improvising. Paint damage, deep scratches, and mechanical concerns all belong with experienced hands. For broader vehicle care, Manakin Auto Service describes the kind of general care that supports routine washing. In the end, a good wash routine and timely professional care together keep a car looking and working its best.
Learning how to wash a car properly is a skill that improves with every wash. The first attempt may feel slow, and that slowness is actually a good sign. Careful, gentle, panel-by-panel washing protects paint, preserves the finish, and makes each later wash easier. Start with the checklist, trust the sequence, and enjoy the result. A clean car, washed the right way, is one of the simplest pleasures of ownership.